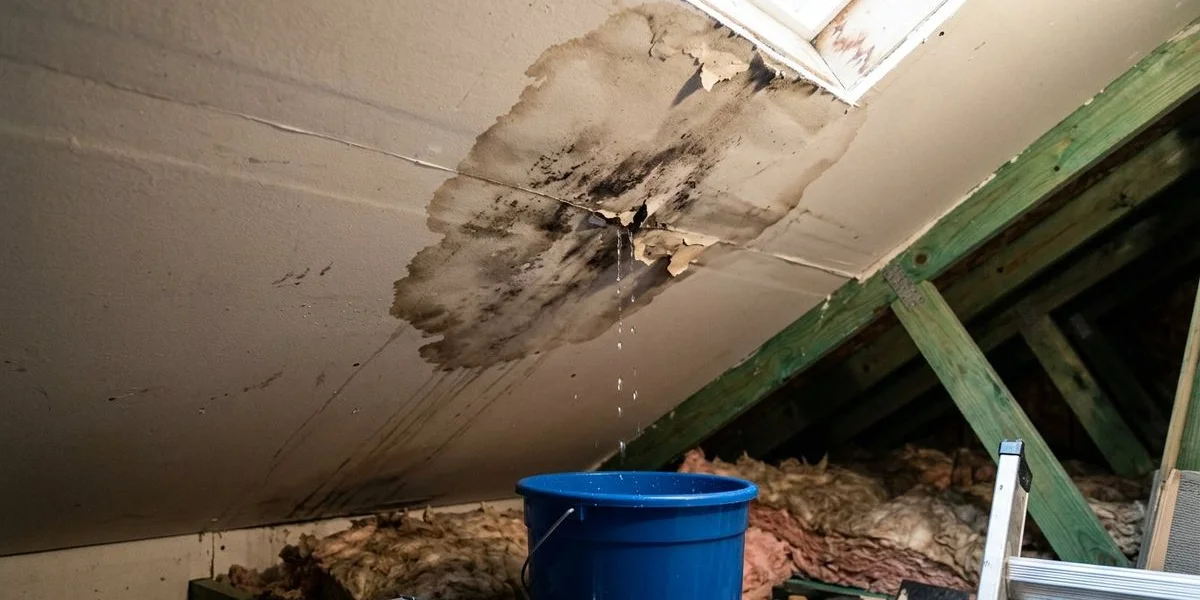
Discovering water dripping from your ceiling is one of those homeowner moments that triggers immediate panic. Whether it is the middle of a spring rainstorm or you have just noticed a growing brown stain on your ceiling, knowing what to do right away can mean the difference between minor repairs and thousands of dollars in water damage.
Our team has responded to hundreds of emergency leak calls across the Treasure Valley, so we know exactly how stressful this situation feels. Most homeowners assume the damage is done the moment the water appears, but the reality is that your quick reaction in the first hour matters most. You can significantly reduce the restoration bill by managing the water flow before we even arrive.
We want to walk you through exactly what to do when your roof is leaking. This guide breaks down the immediate containment steps, the specific documentation you need for insurance, and how to safely bridge the gap until a professional fix is possible.
Step 1: Contain the Water Immediately
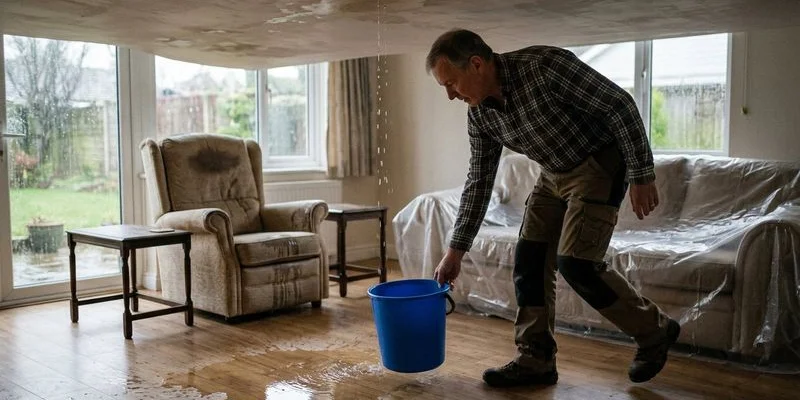
Your first priority is preventing water from spreading and damaging more of your home’s interior. We recommend focusing on controlling the flow rather than just catching it.
Follow these containment protocols:
- Place buckets or large containers directly under every drip point.
- Use the “String Trick”: If the water is splashing out of the bucket or dripping erratically, pin a piece of string to the source of the leak and let the other end dangle into the bucket. The water will follow the string down smoothly, eliminating the splash that ruins floors.
- Lay down towels or old sheets around the buckets to catch splashes.
- Move furniture, electronics, and valuables away from the affected area.
How to Handle Ceiling Bulges If water is pooling on a flat ceiling, you might see a bubble forming in the drywall. We advise you to carefully poke a small hole in the center of the bulge with a screwdriver and place a bucket beneath it. This sounds counterintuitive, but a controlled drain point prevents the water weight—which can quickly exceed 50 pounds—from collapsing a larger section of drywall.
Do not ignore a small drip. Water takes the path of least resistance, and what looks like a minor leak at the ceiling may indicate a much larger volume of water traveling along rafters, insulation, or ductwork above.
Step 2: Document the Damage
Before you clean anything up, take photos and videos of everything. This documentation is critical for insurance claims and will help your roofing contractor understand the scope of the problem.
Create a comprehensive evidence file:
- The Source: Photograph water stains, active drips, and pooling on ceilings and walls.
- The Impact: Capture any visible damage to drywall, paint, flooring, or personal belongings.
- The Conditions: Snap a photo of the exterior roof (from the ground) and a screenshot of the local weather report to prove storm conditions.
- The Timeline: Note the exact date and time the leak was discovered.
Our experience with insurance adjusters shows that “sudden and accidental” damage is often covered, while “gradual” damage from lack of maintenance is not. Thorough documentation helps prove the incident was specific and sudden.
Step 3: Attempt a Temporary Fix (If Safe)
Important: Do not climb onto a wet roof. Wet roofing materials are extremely slippery, and falls from roofs cause thousands of serious injuries every year according to the CPSC. We strongly advise only attempting exterior temporary fixes if the roof is dry and you can safely access it.
Interior Mitigation
If you can access your attic, bring a flashlight and carefully trace the water trail upward. The actual entry point on the roof is often several feet away from where the leak appears on your ceiling due to water traveling down rafters. If you find the source, we suggest applying a patch of plywood or a water-diverting tarp inside the attic to push water toward a soffit vent or bucket.
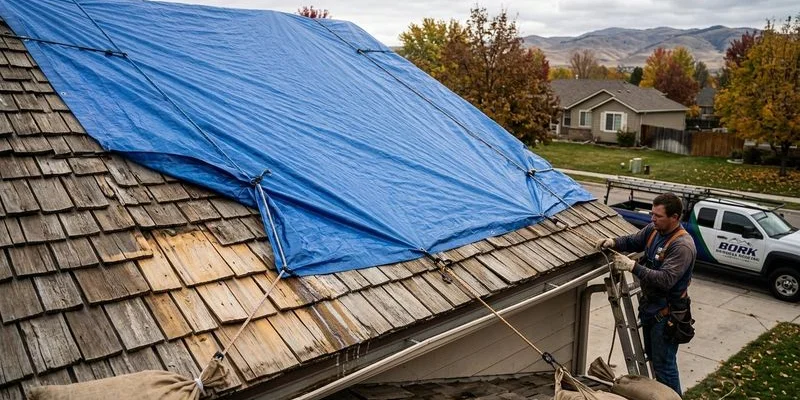
Exterior Patching (Dry Conditions Only)
If you can identify the damage from the ground, such as missing shingles or a visible gap, a tarp can provide temporary protection. Secure it with boards or weighted objects, making sure it extends well past the damaged area on all sides to prevent wind from lifting it.
Comparison of Emergency Patch Options
| Method | Best For | Pros | Cons |
|---|---|---|---|
| Roofing Tarp | Large areas of missing shingles | Covers wide areas; removable | Hard to secure in high wind |
| Henry 208R Wet Patch | Small cracks or holes | Sticks to wet surfaces; immediate seal | Messy; creates a permanent black patch |
| Interior Catch | Unsafe roof conditions | 100% safe; no climbing required | Does not stop water entry, only manages it |
For most active leaks during a storm, the safest and most effective approach is to contain the water inside and wait for the weather to clear before addressing the exterior.
Step 4: Turn Off Electricity in the Affected Area
If water is leaking near electrical outlets, light fixtures, or junction boxes, turn off the electricity to that area at your breaker panel. Water and electricity are a dangerous combination. We recommend using a non-contact voltage tester (NCVT) to confirm power is off before touching any switches or outlets in the wet zone.
If you are uncertain which breaker controls the affected area, turn off the main breaker until a professional can assess the situation.
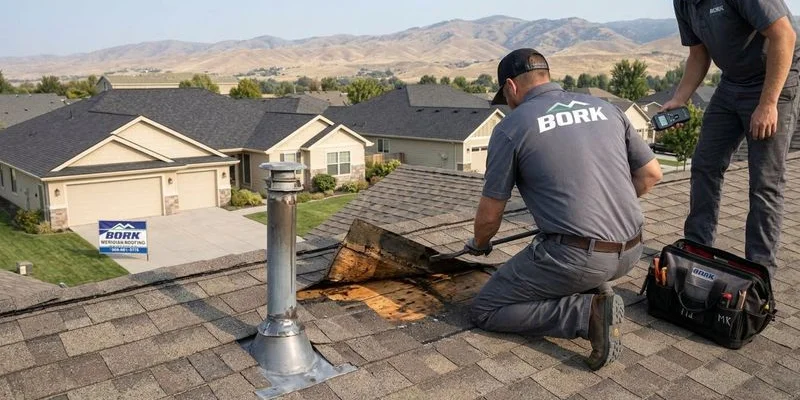
Step 5: Call a Professional Roofer
Once you have contained the immediate damage and documented everything, call a licensed roofing contractor. At Bork Roofing, we offer emergency roof repair services across Meridian, Boise, Nampa, Eagle, and the surrounding Treasure Valley area.
When you call, be ready to describe:
- When the leak started and how severe it is.
- Where in the home the water is entering.
- Whether you can see any visible roof damage from the ground.
- Your home’s age and when the roof was last replaced or repaired.
A professional roofer will conduct a thorough inspection to find the exact source of the leak, which is not always obvious. We often find that water enters at one point and travels significant distances along framing before dripping through a ceiling.
Common Causes of Roof Leaks in Idaho
Understanding what typically causes leaks can help you identify the problem area.
Storm Damage
Treasure Valley hailstorms and high winds are the most common culprits. Hail cracks or displaces shingles, and wind gusts can lift shingle edges or tear them off entirely, exposing the underlayment to water penetration.
Flashing Failures
Flashing around chimneys, skylights, vents, and wall-to-roof transitions is one of the most common leak sources. We frequently see flashing that has corroded, pulled away from the brick, or had its sealant degrade due to thermal expansion.
Ice Dams
During Idaho winters, ice dams form at the roof edge when attic heat melts snow on the upper roof, which then refreezes at the colder eaves. The trapped water backs up under shingles and finds its way inside.
Age and Wear
Asphalt shingles lose granules and become brittle over time, especially under Idaho’s intense summer UV exposure. Once the protective granule layer is significantly depleted, the underlying asphalt is vulnerable to cracking and water intrusion.
Clogged Gutters
When gutters are packed with leaves and debris, water backs up and can seep under the roof edge or behind fascia boards. This is an especially common issue in neighborhoods with mature trees.
What Not to Do During a Roof Leak
- Do not climb on a wet roof under any circumstances.
- Do not ignore a small leak hoping it will stop on its own.
- Do not use silicone caulk for repairs; it prevents professional roofing materials from adhering later.
- Do not remove saturated insulation yourself without proper protection, as it may contain mold.
- Do not wait weeks to call a roofer, as secondary damage from moisture grows rapidly.
- Do not ignore the 48-hour rule: The EPA states that mold can begin to grow on damp surfaces within 24 to 48 hours.
Get Emergency Help Now
If your roof is actively leaking, contact Bork Roofing right away. We respond to emergency calls throughout the Treasure Valley and will get your home protected as quickly as possible. Our team also works with insurance companies to help streamline damage claims for storm damage repairs.
A roof leak feels overwhelming in the moment, but taking these steps calmly and methodically will protect your home and set you up for a faster, smoother repair process.